
Inpixio is a photo editor that allows you to remove backgrounds, erase objects or even figures.
In this simple tutorial, I will show you in detail how you can erase any Background, remove unwanted objects from images using Inpixio and still have a professional-looking image.
Open Up Inpixio Photo Studio.
In this tutorial am going to be using the Inpixio Photo Studio version 10.4. You can get your own copy if you don’t have one already and follow along.
Your interface should look similar to the one you see below. If you have the free version the features and lay out may look different.
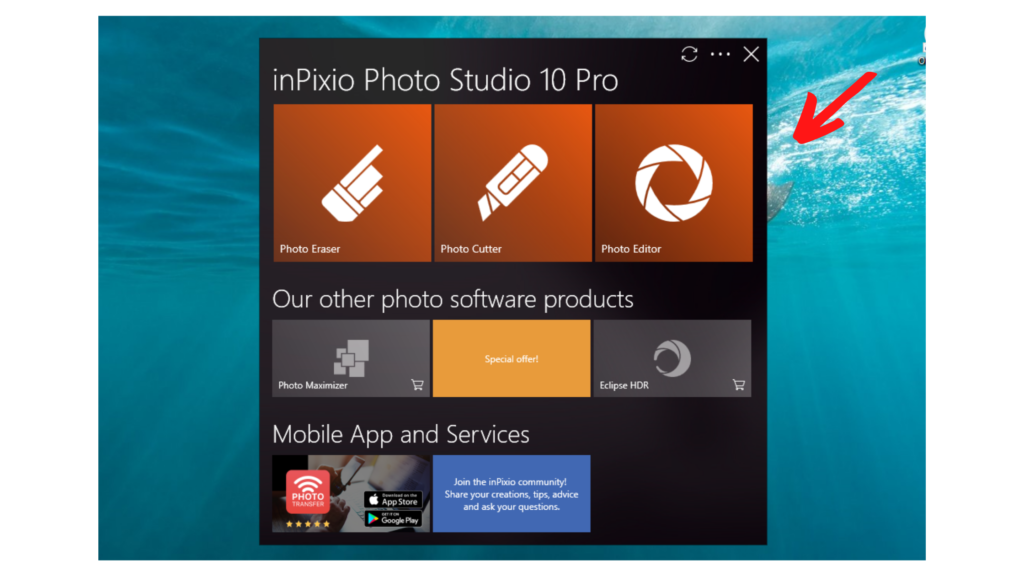

To erase any background or object you can use the Photo eraser or photo cutter the idea remains the same. In this tutorial, we are going to be using both editors to show you how well you can use the software.
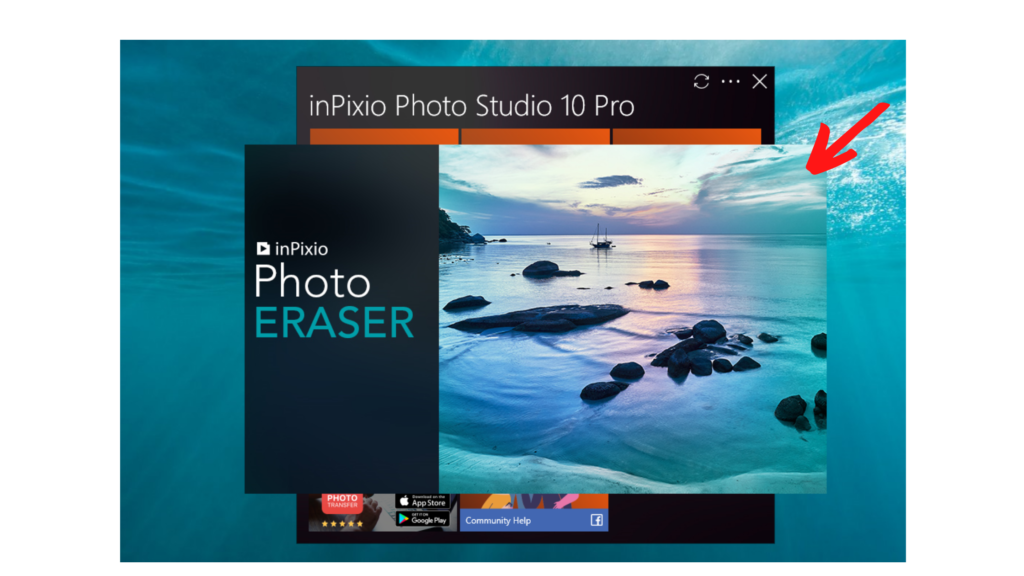

This is the perfect editor for removing specific objects in an image. Once you have loaded this up go ahead and open the files you want to edit, in other words, import them into the software.
The images used in this tutorial were downloaded or sources from Pixabay. And that means you can also use some of their images or look at my photo sites guide attached below.
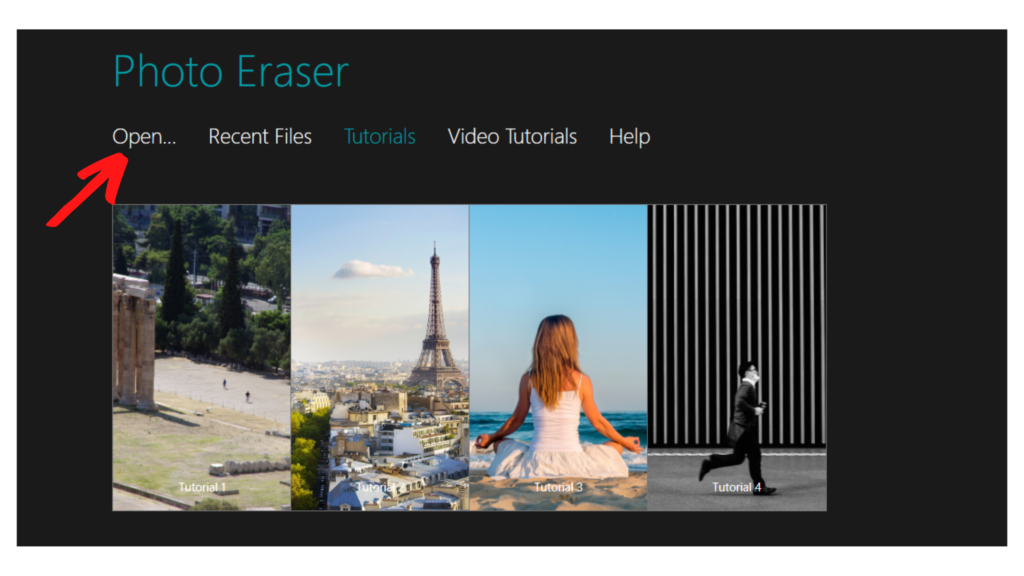

Once you have your images loaded up and ready you should be inside your screen editor ready to go. If you are in need of some good images you can check out the best stock image sites that don’t suck.
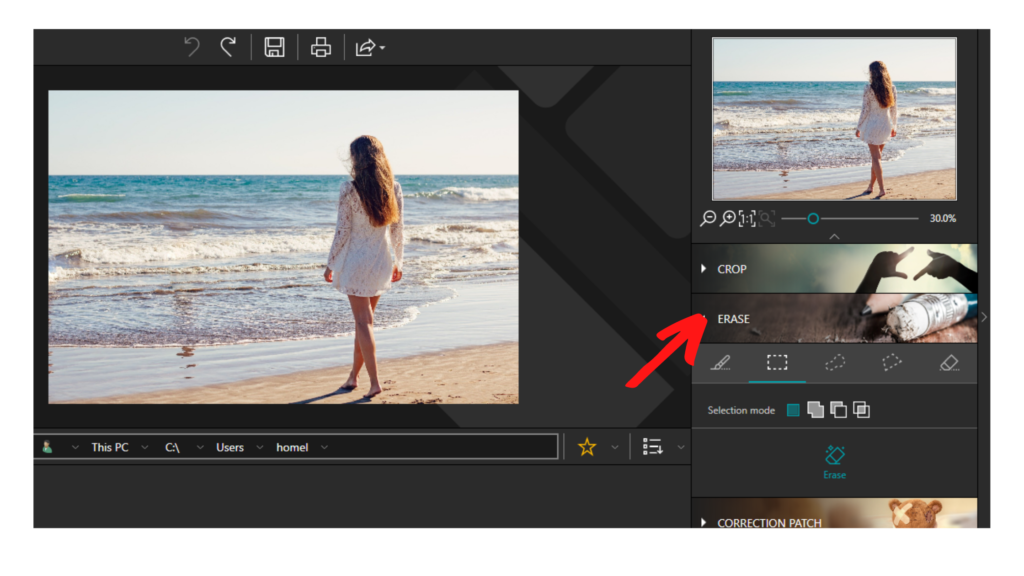

On the right menu, you should see the erase menu. To erase the Image all you need is to simply use the drag feature and highlight the unwanted image.
For this example, we are going to be erasing the woman in the right of the feature.
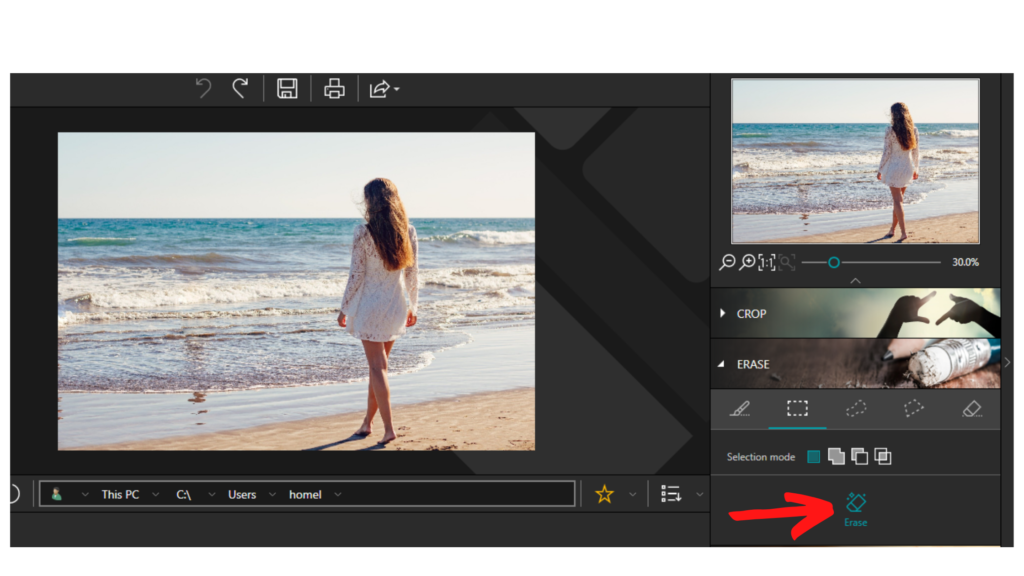
After you have highlighted your unwanted picture go ahead and hit the erase button in the right menu.

Once the processing is done you should have an erased image. It won’t always be perfect for some images but 9 times out of 10 the software gets the job done.
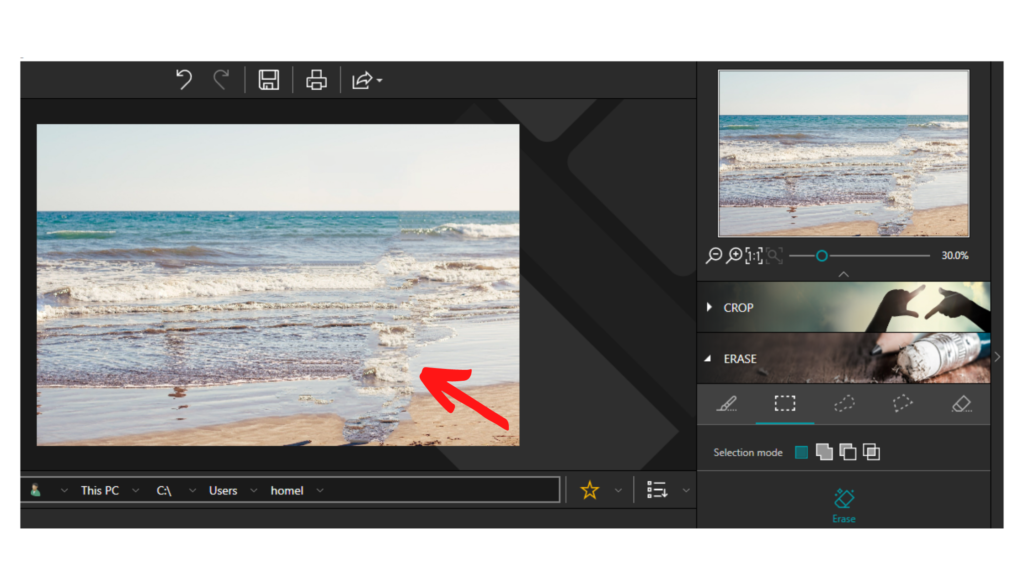

You can go ahead and save the image using the icons at the top, if all looks great, You can keep undoing and redoing the changes until it’s perfect.
Removing Background Using Inpixio Photo Cutter.
Similarly to the removal of specific objects, you will want to open up and launch Inpixio photo studio.
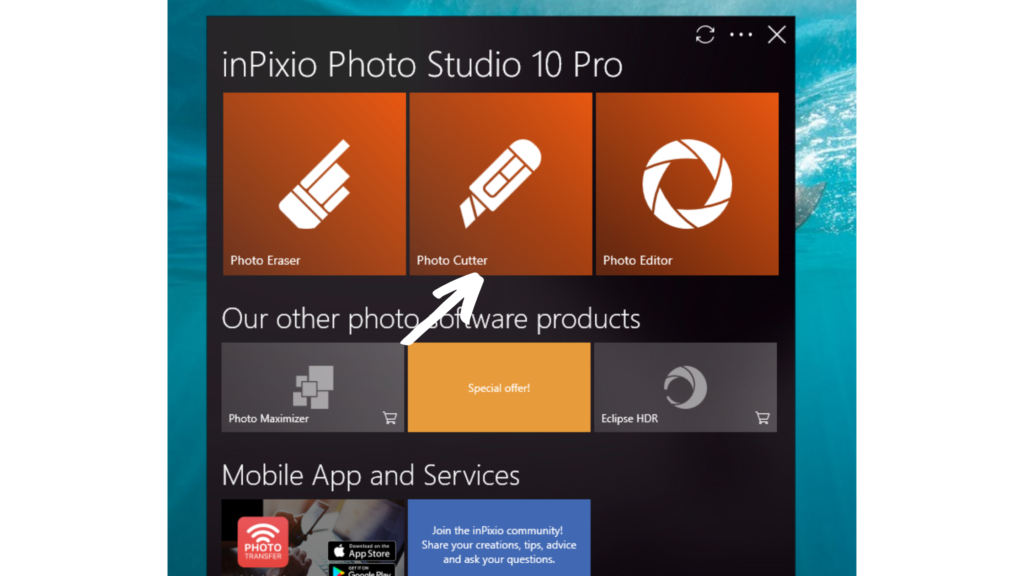

Once you have this loaded up then go ahead and choose the Photo cutter. This should load up and go ahead choose your images form your device. If you have recent files you have used before you could go ahead and open those as well.
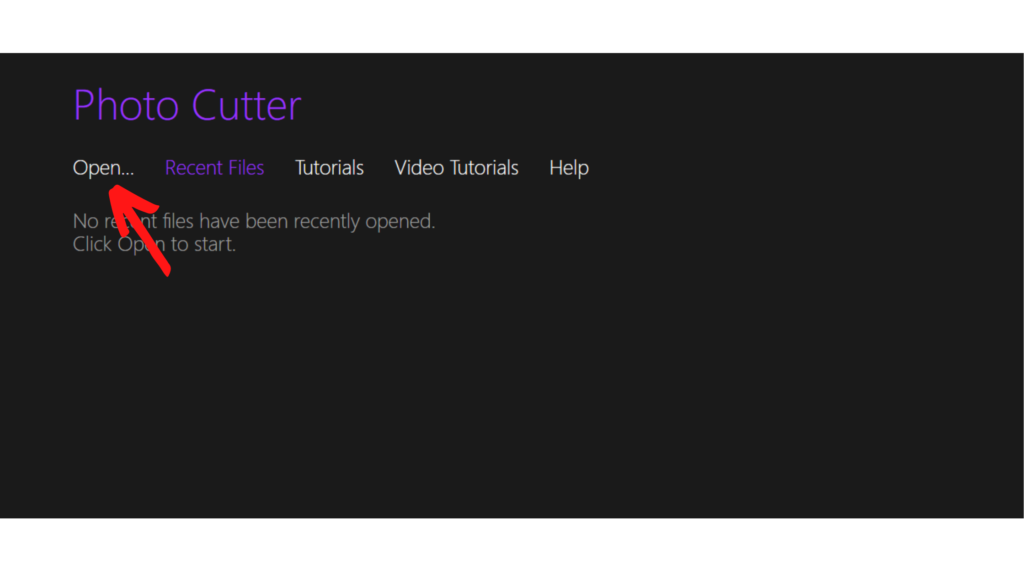

Erasing the background is the fun part because all you need to do is some scribbling on the background and let it process it for you.
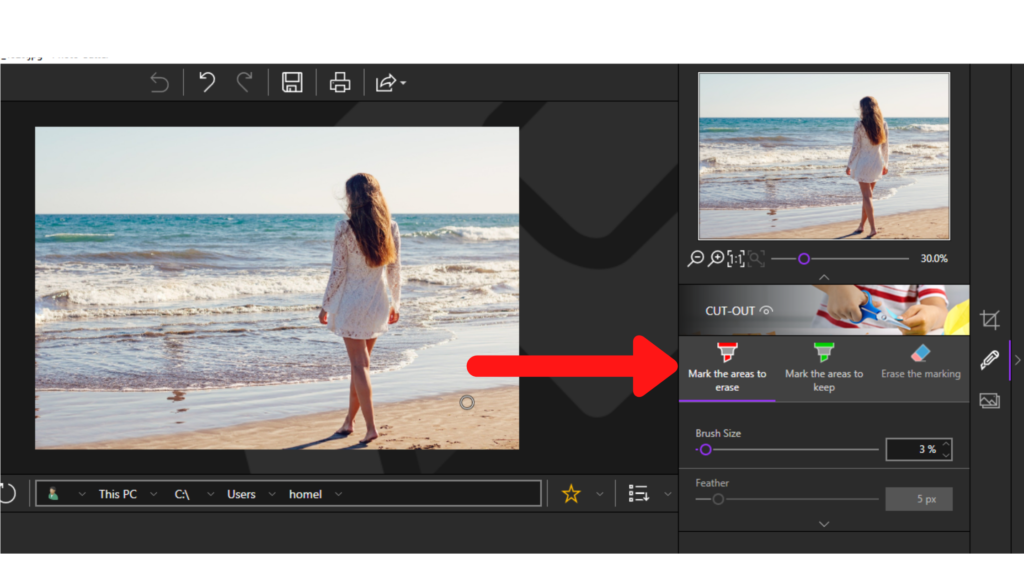

Erasing can be done in two ways which means you can erase the background by marking it out or you can mark the desired areas to keep.
You can see this easily on the right menu . You can play around with the brush size to see how your image will look like.
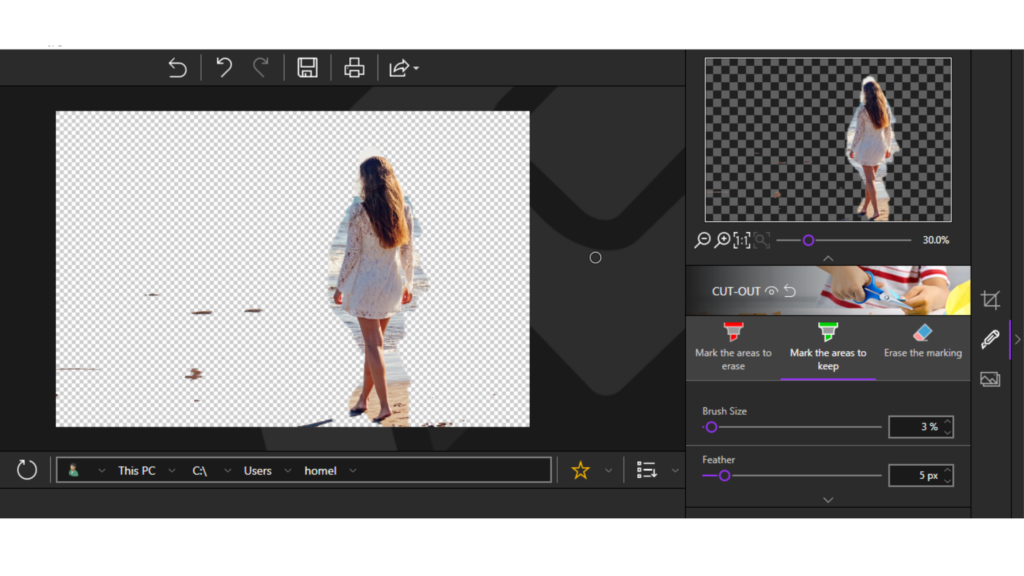

You can change the brush size, adjust or zoom in to get even more detailed with your cuts.
The last thing as always don’t forget to save all your edits after using the software. That is how easy it is. Hope it was helpful.
Here are some extra details you should know about Inpixio as a software that can be of help to you as well.
Inpixio has a couple of free versions you can download and use starting today. You can try the software by downloading it using the links in this article.
Inpixio can be used for professional and simple photo editing, cropping, change filters and so much more…
Final Quote
Inpixio is a great tool that comes in handy incase you are dealing with background removal, object erasing and any photo editing technique can be used with Inpixio.
The software has a free version you can try and you can get it as well using any of the links in this article.
This article contains affiliate links which means I get compensated for any upgrades made via clicking an affiliate link. This however adds no additional cost to you as it is software I use myself.
Good luck and nice creating.
I will see you on the next one!.

